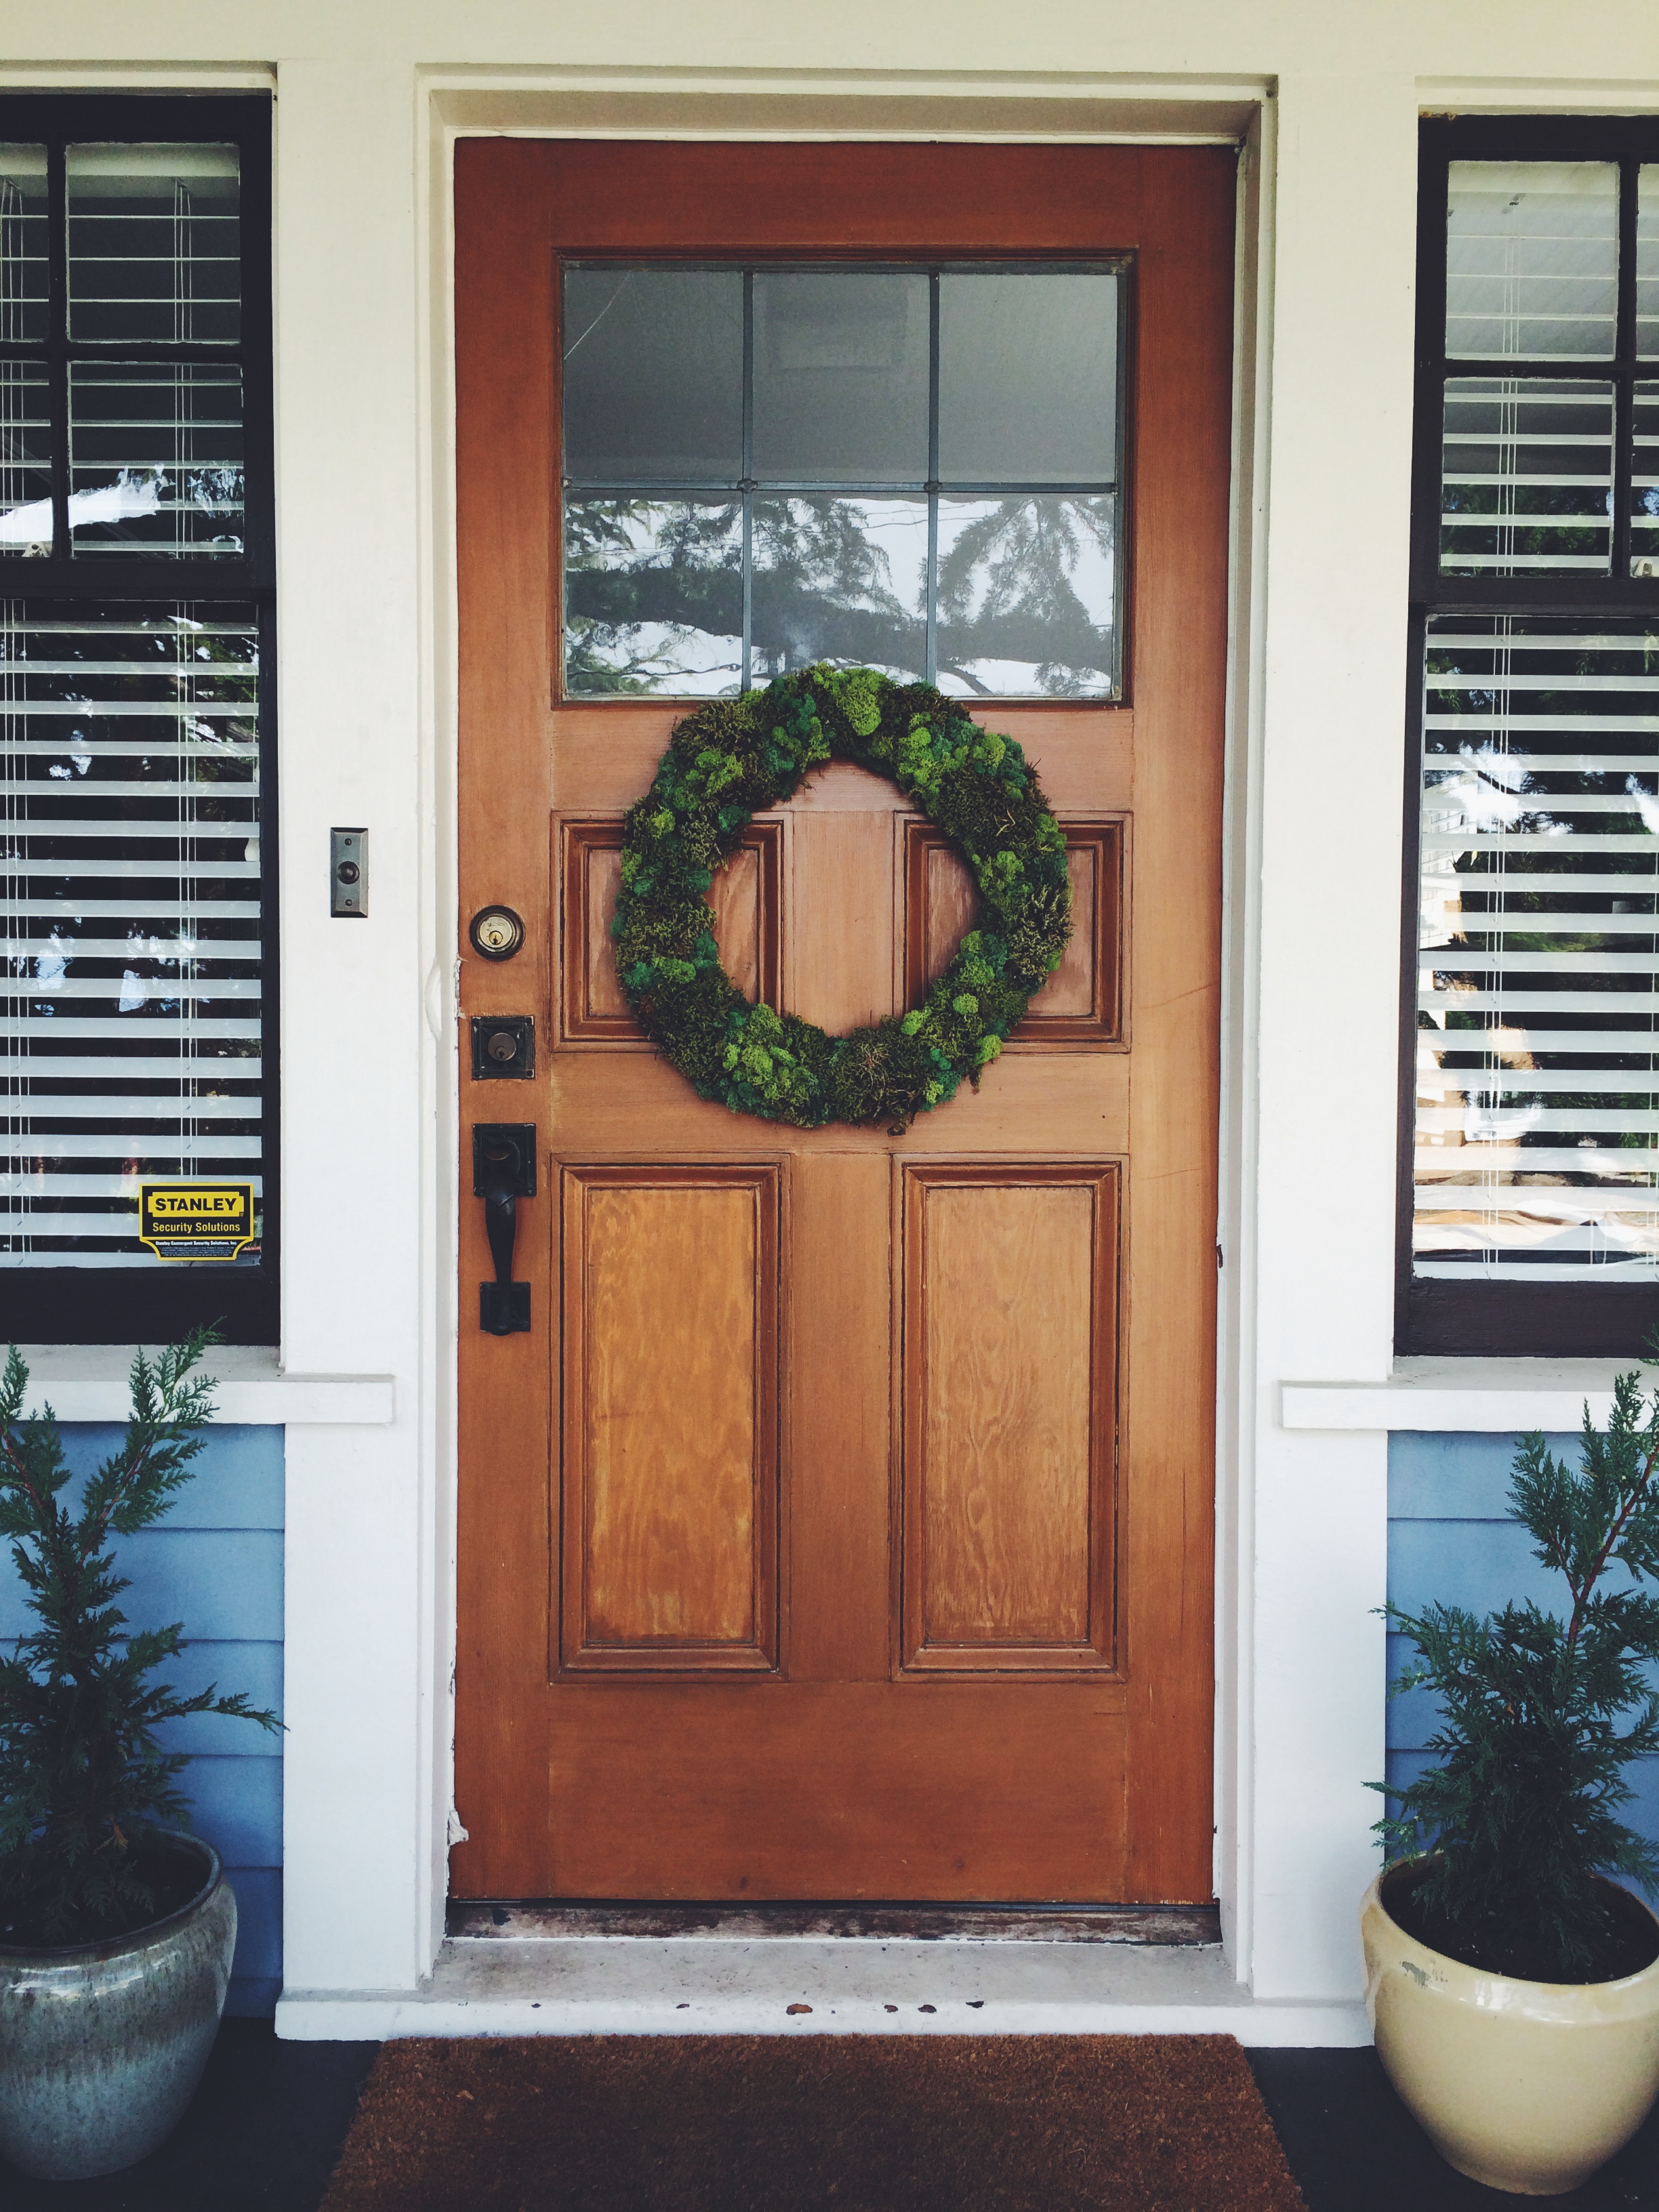
I saw this great photo come across one of my blogs a month or so ago. Forgive me for not remembering which, but it was this incredible moss wreath hanging perfectly on someone’s front door. An inviting front porch is such an important component of a house — I knew immediately that this needed to be on ours. It made for the most amazing entrance!
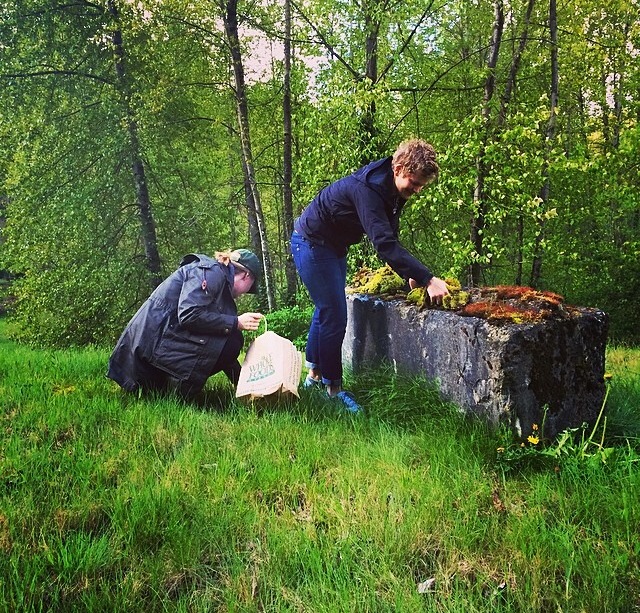
We took a little day trip out to Woodinville shortly after to putz around some estate sales and admire the expansive plots of large, undeveloped land (“shopping”). At some point along the trip, I spotted a HUGE pile of moss collecting on an old cement something or other. With that wreath fresh on my brain, I slammed on the breaks, threw it in reverse, and hopped out with a tiny brown paper bag we had our lunch packed in. In about 2 minutes flat, I had an overflowing bag full of bug-laden moss of all sorts of varieties. Like a kid in a candy shop, I tell ya!
After inspecting my loot, I realized that I wanted some brighter green colors incorporated to make it pop against our camel door. Not only that, but I needed some sort of wreath form (the Goodwill NEVER has what you want when you’re looking for it). A trip to the craft store was in order. I grabbed two pre-packed bags of Moss from Michael’s and particle board type form. I had a hard time deciding which of the handful of options would work best (Styrofoam? Wire? Wood?), but I went with the cheapy, not sure how the project would turn out. Eventually, I might make a more substantial version of this, but for now, things turned out just fine. If you happen to take this project on and use something else, let me know how it works!
What you’ll need:
- Wreath form (particle board worked wonderfully)
- Hot glue gun (don’t forget the glue — can’t say I haven’t made that mistake before)
- LOTS of moss in LOTS of colors/varieties
- An area that can get dirty (you’ll be shaking off a lot of bugs and dirt, getting hot glue strings everywhere, and will have lots of moss bits stuck to anything within 4ft of you)
How to do it:
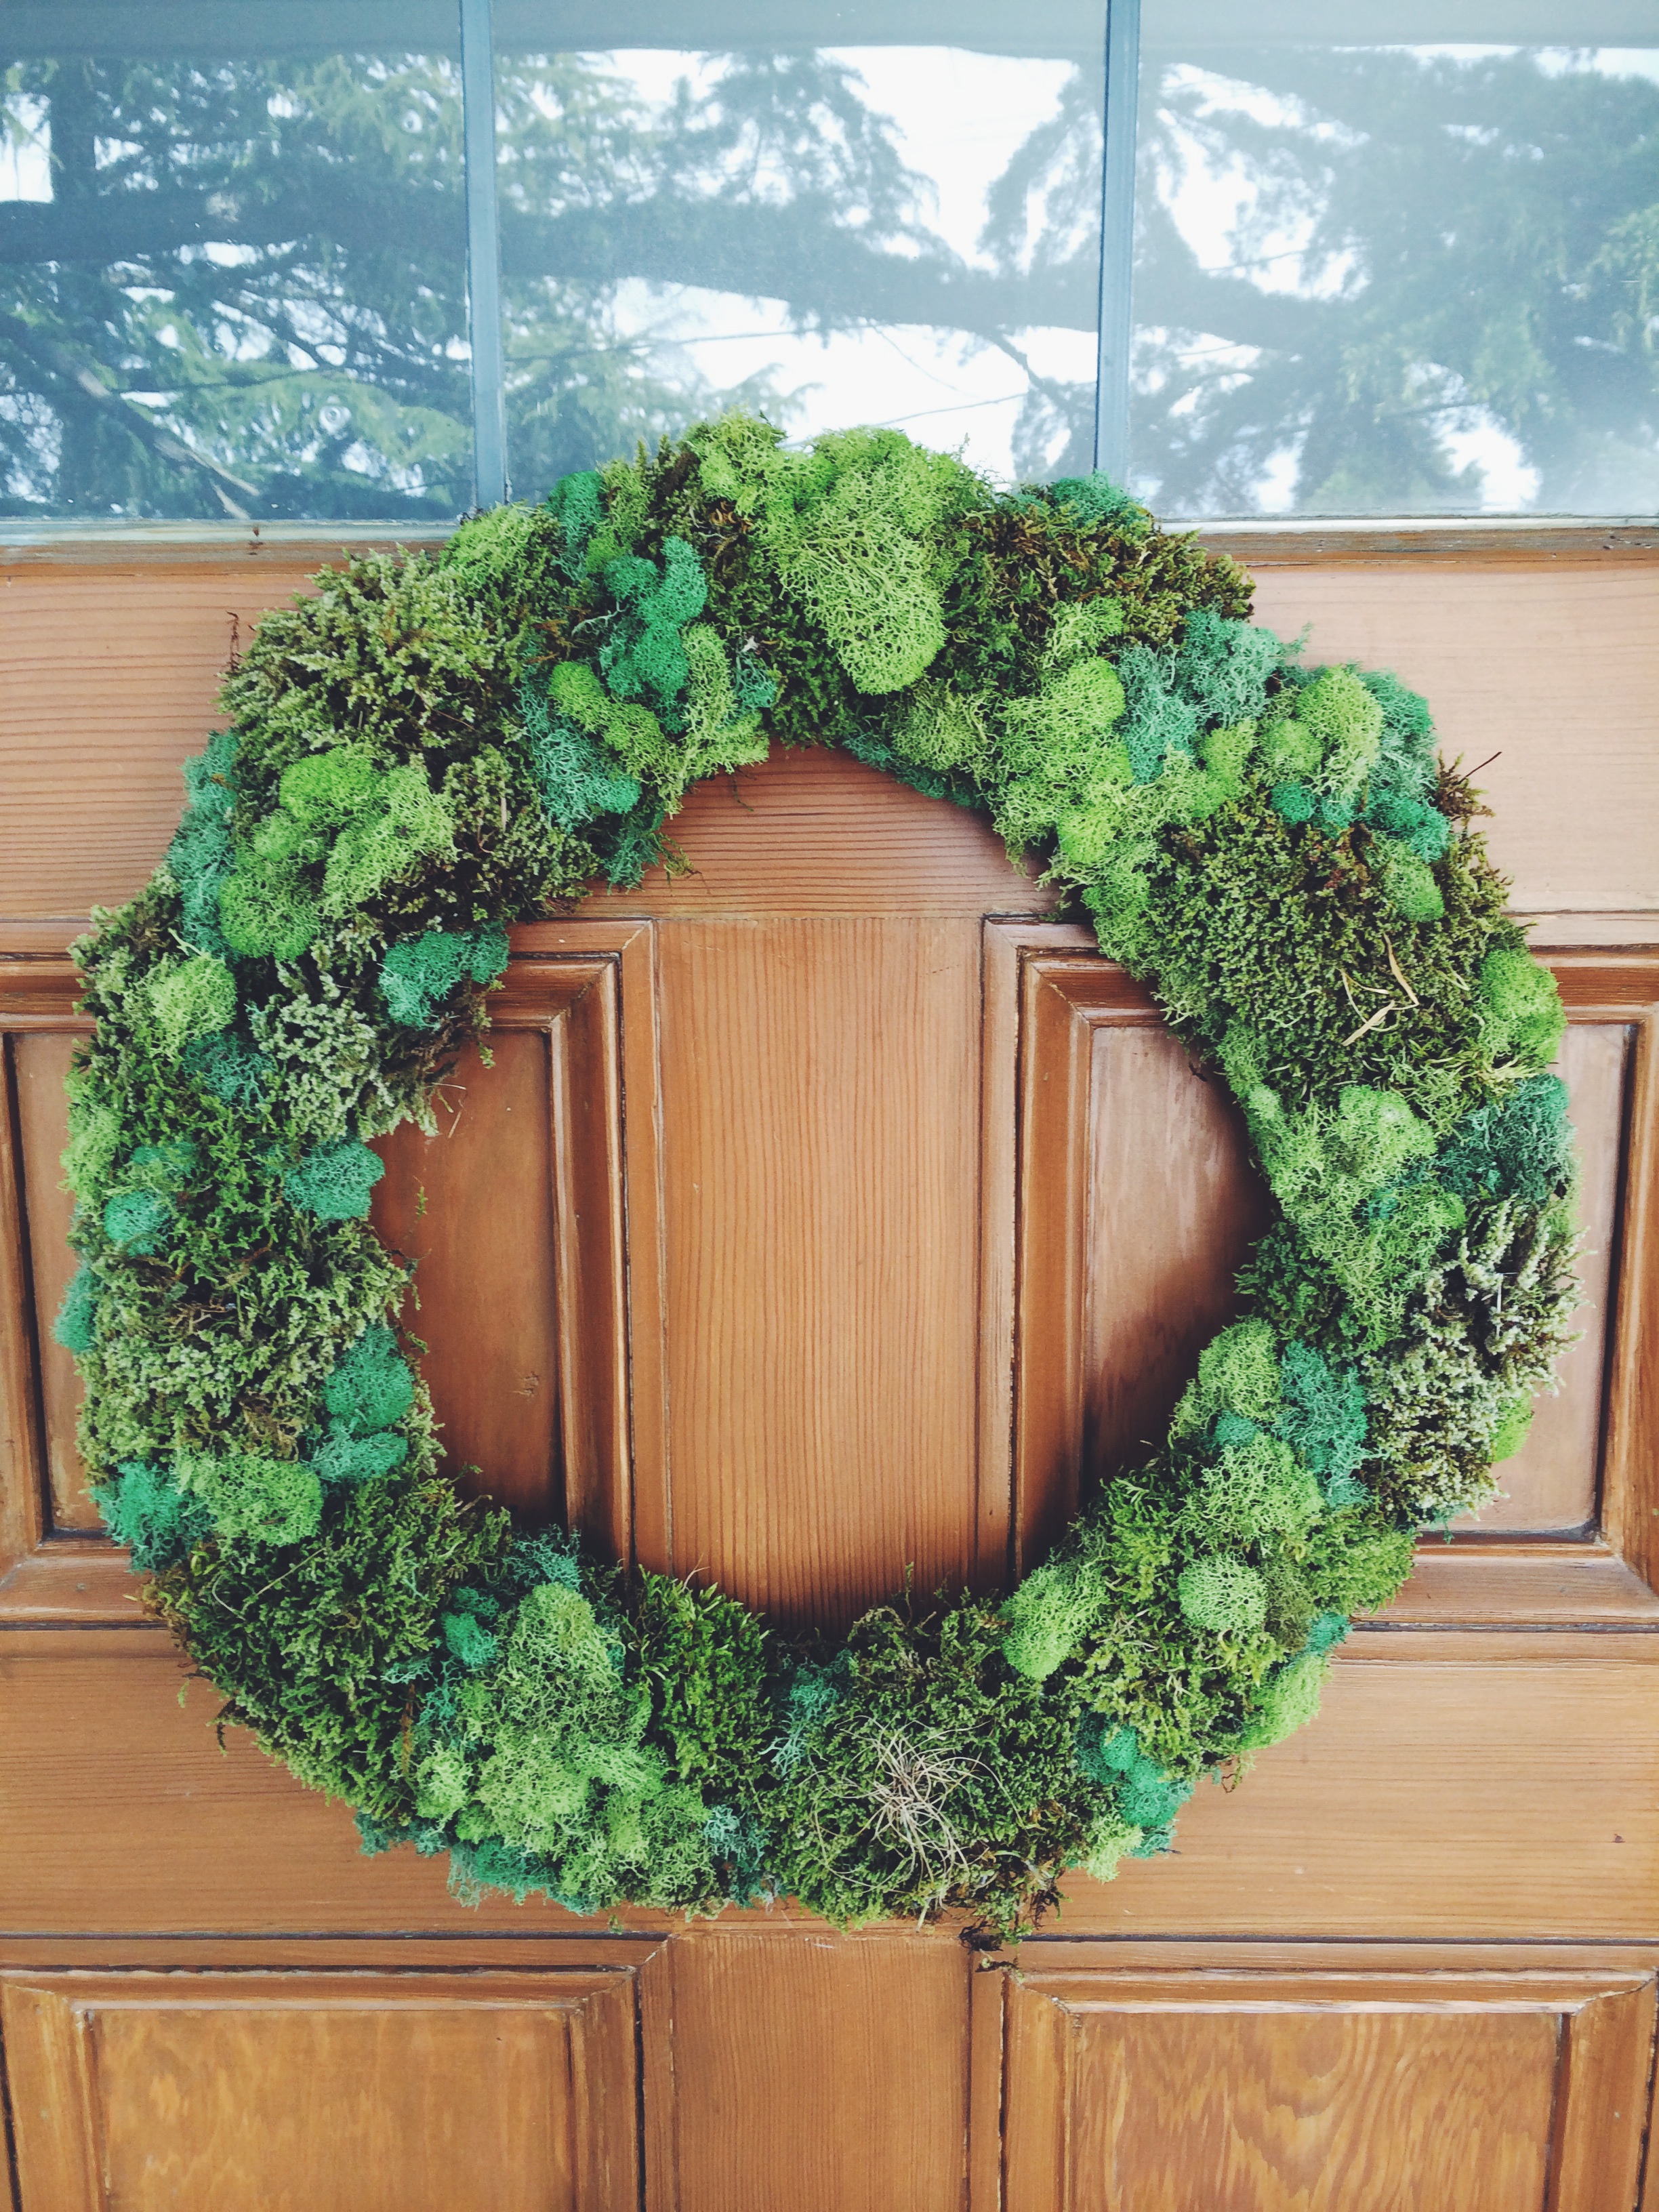
I first sorted my moss by size and type. It was super helpful to have larger pieces available for the base layer — so those went down first. Don’t hesitate to be liberal with your glue to ensure it it’s really on there. From there I simply built layer upon layer upon layer. I tucked and lifted and glued and unglued until I had the perfect aesthetic. It was about two hours worth of work in total, and my ADD started rearing it’s ugly head about 30 minutes in, but it was one of those addicting projects that, however tedious, you simply CAN’T stop working on it! And in the end, the result was well worth it.
Here’s how it turned out…